
Showing posts with label food and recipes. Show all posts
Showing posts with label food and recipes. Show all posts
Thursday, February 7, 2013
Wine Pairing

Saturday, January 12, 2013
Gluten Free Chocolate Spice-Nut Donuts with Vanilla Apple Glaze
.JPG)
Back to the donut. Ok, so I've seen these little guys made on countless blogs. In fact, GlutenFreeGoddess.com has a great pumpkin donut recipe I want to try next. The problem was, I didn't have one of that fancy donut machines or a donut pan. Ok, sure I could have whipped them up and plopped them in a mini muffin tin but then they wouldn't have been donuts would they. There is just something magical about a ring of sweet dough with a hole in the middle. So alas I could read and wish, but not bake.
One of my hobbies is thrifting. I love it. I am fortunate that I get to travel a lot with work, so I get to explore thrift shops around the country...the bad news is, I can't always buy stuff and carry it with me when I'm traveling, which I guess could be a good thing too ;) Anyway. The other day I was thrifting and I found a mini donut maker!! It just materialized right then and there for me to find and bring home. And so I did. I decided to do a test run on my new toy and so I went with what I had and made these deliciously satisfying donuts.
Also, this is so super simple you won't even believe it! Low-fat, white flour-free, gluten-free, dairy-free, low-sugar; this donut is pretty awesome if you ask me. Here's the recipe:
Donut Ingredients:
1/4 cup soy flour
1/4 cup really good organic cocoa
1/4 cup granulated sucralose powder blend
1/2 cup liquid egg substitute
1 tsp pumpkin pie spice
3/4 tsp baking powder
1/4 tsp vanilla
Apple Glaze Recipe
1/2 cup unsweetened apple sauce
1/2 cup vanilla almond milk, more or less depending on desired consistency
1/4 cup granulated sucralose powder
1/4-1/2 cup chopped nuts, your choice nuts and amount
3 tbsp cornstarch, tapioca, or potato starch
1/2 tsp vanilla
For the donuts, combine all the things and mix well. Then place tablespoonfuls of batter into each mold of a preheated donut machine, or into lined mini muffin tin (but they won't be donut's, they will be muffins, the lesser cousin of the donut and the kid sister of the cupcake, I'm just saying.) After about 2 or 3 minutes your mini masterpieces will be piping hot and ready to cool a bit before glazing. Repeat with remaining batter.

In the meantime, as you hold your composure and not sample one of these little morsels, mix together all of the glaze ingredients, except for the nuts, in a saucepan and bring to a boil, stirring constantly. Your glaze should thicken. Remember, you can add more or less starch depending on how thick or runny you want your glaze to be. Put the nuts into a small bowl and set aside. Pour the glaze into a small bowl and then dip each donut into the glaze, making sure it is covered well. You can be as generous as you want. While your glaze is still tacky, dip the donut into the chopped nuts to top them. These are moist, not too sweet, and awesome!
.JPG)
Friday, January 11, 2013
Noodle Free Zucchini Lasagna


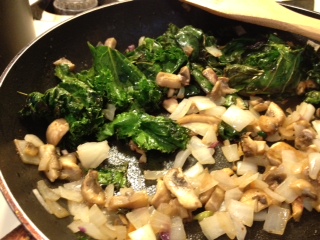


One your zucchini has been layered with love, sprinkle on a little chopped tomato, and more seasonings. Feel free to sprinkle grated parmesan or panko to the top which gives it a nice texture and browns beautifully in the oven. I choose panko. Stick this masterpiece in a nice hot 350 degree oven for about 30 minutes or so. You will be able to smell the seasonings working their magic in the oven.

So, here's the recipe:
3 medium sized zucchini - sliced
1 small bunch of kale
1 large tomato - sliced, reserve 2 tbsp chopped
1 cup mushrooms - diced
1/4 cup onions - diced
2 tbsp crushed garlic
fresh basil and oregano - chopped, to taste
salt and pepper - to taste
1/2 cup plain greek yogurt, to taste - divided
Preheat oven to 350degrees. Slice zucchini and tomato and set aside. Saute kale, mushrooms, onion, and garlic. In the bottom of a lined and sprayed loaf pan layer zucchini slices and top with tomato, add basil, oregano, salt, and pepper to taste. Add a layer of the kale-mushroom mixture over this and top with 1/4 cup greek yogurt dollops, then add salt and pepper. Top this with another layer of zucchini slices and continue building each layer. Sprinkle the top of the zucchini lasagna with chopped tomatoes, basil, oregano, salt, pepper, and parmasan or panko to taste. Bake in a 350 degree oven for about 30 minutes, or until the dish is cooked through and the parm/panko has browned. Let rest for at least 5 minutes before slicing and serving. Makes 4 servings.
Saturday, December 29, 2012
Homemade Christmas Gifts

I make homemade Christmas gifts most every year. Sometimes these are edible, sometimes they are wearable, and sometimes they are crafty, and sometimes they are just thoughtful cute trinkets that I think the person would like. This year I decided to go with a theme to my gifts and to make them edible. Since I am from the South, and I'd be traveling to visit friends in the North, I thought it would be cute to make gifts that could be packaged or made in glass jars, or Mason jars.Mason jars are the unsung staples of a Southern kitchen; not only are they used for canning and jellies they are also used for drinking, measuring, and storage. As a bonus they are reusable and recyclable, so they are much friendlier to the environment than paper or plastic packaging.
As I mentioned, I was traveling and I didn't have use of my own kitchen, however I wanted to make edible gifts. I could have baked a bunch of stuff and then shipped them ahead, but I was going to be staying for several weeks so I would have had to bake a month ahead of time which would have rendered my creations hard and brittle by Christmas. So I had to think of what I could do in the confines of a hotel room without an oven or stove.I decided to on 3 wonderfully delicious gifts that are edible and made/packaged in jars yet do not require any cooking. I love NON recipes! NON recipes stands for "No Oven Needed" recipes and I just can't get enough of them sometimes, especially on super hot days or in cases like this where I'm traveling a lot and I'm away from my kitchen. Well, here they are, starting from the easiest one.
.JPG) |
| Hot Cocoa and Mint-choc Chips with Chocolate-Mint Marshmallow stir sticks |
I bought two different kinds of cocoa, a dark chocolate and a milk chocolate. Then I found mini chocolate chips with peppermint swirls, so I had to have those!. I then picked up a bag of Jett Puffed Chocolate Mint Marshmallows and some skewers (I searched for lollipop sticks but that particular grocery store didn't carry them. You could use either one, just remember that skewers have a sharp end.)
Basically I layered a serving of dark chocolate cocoa in the jar, then topped with a layer of chips, then a layer of milk chocolate, and a final topping of chips. As you can see in the picture, the powdered cocoa ended up covering up the layer of chips in the middle, but it'll still taste good :). I thought it would be cute to add a few stir sticks made with a peppermint and chocolate marshmallow, this way the mallow can melt into the hot chocolate as it stirs. Yum! As an aside, I love these particular marshmallows because they aren't as large as normal sized marshmallows yet they aren't tiny either. I placed the jar inside a gift bag and then I taped the stir stick package to the top, along with a cute little instruction tag.
 |
| No-Bake Nutella Oatmeal Cookies |
These wholesome little chewy cookies were made with a variation of the recipe from The Vintage Mixer except I used almond butter instead of peanut butter and I used a sucralose sugar-substitute instead of sugar. The final result was deliciously decadent cookies that you can really sink your teeth into and only seem "bad" for you, which is a good thing. I also flattened these out a bit to form jar-sized rounds instead of balls, that way I could stack them neatly in the jar. I was able to fit 6 chewy chocolate cookies into each pint sized jar gift, and I ended up making 4 jars of these. So each individual person with their individual diet limitations were able to get half a dozen scrumptious sweets, handmade for the holidays.
 |
| Handmade Christmas: Homemade Lemoncello in a Mason Jar |
I actually caught the episode of Everyday Italian on Food Network which showed this recipe. I was enthralled. I had experienced limoncello at an Italian Bistro as an after dinner cordial and I loved it. I had no idea it could be made like this. All you really need is about a dozen lemons and some 100-proof vodka. 100 proof vodka isn't very easy to find it seems, I had to go to a few stores to get some. You can use regular vodka if you wish, but it will become less potent after the brewing process due to dilution, so just keep that in mind. I altered the recipe from Giada De Laurentiis to use sucralose instead of sugar, and I used a microwave to make the simple syrup instead of a stovetop. After the limoncello had brewed completely I decided to split it up into smaller decorative glass bottles so that each person could have some as a gift. I found the bottles at Pier One. Here's how it looked:

Monday, April 18, 2011
Creation - Scrapbooked Recipe Box

The other day I decorated a recipe box and I wanted to share the tutorial I made for it.
I am really proud of this new home that I am creating and I wanted to make sure my things reflect this. I have seen some designer recipe boxes with motivational quotes and pretty designs, but I didn't want to spend over $20 on a recipe box that may or may not reflect my personal style - so I went ahead and made my own! I used an index card file box that I got from the dollar store and scrapbook paper and embellishments that I had lying around from a previous project. I even got the glue gun and glue sticks from the dollar store too! My project cost about $3 all told. Not too shabby huh!
Sometimes I take my surroundings for granted and I barely glance at household things that I use on a daily basis...but now that I am starting to practice awareness and gratitude I am noticing that my visual surroundings are important to my state of mind. It is not vain to decorate your home or to add your personal flair on your things, that's what makes them truly yours after all!
I also created my own recipe template with Photoshop so that I could type in my recipes and print them neatly on gorgeously designed cards. There are beautiful and affordable recipe cards out there, so you don't have to design your own, especially if you don't have a design program like Photoshop. However I hate my handwriting, I write like a hurried doctor (which I am definitely not!) and it doesn't seem right to ruin those pretty cards with my crummy handwriting so I just made my own so I can print them out with my printer. Also, having the recipes typed out on my computer also gives me an instant backup of my recipes just in case. Here's a random recipe card that I designed and I think it came out pretty good!

Wednesday, April 6, 2011
How-To: Bacon Cinnamon Rolls - Blog Spotlight

Essentially you partially fry up some bacon and then wrap them in pillsbury grands crescent rolls and bake. Yum!
Subscribe to:
Posts (Atom)